How to Draw a Realistic Face: 7 Easy Steps for Beginners
Table of Contents
Learning how to draw a realistic face is one of the most rewarding skills any artist can develop — and the good news is that anyone can do it with the right steps.
Whether you’ve never picked up a pencil before or you’ve been sketching for years without seeing real progress, this guide will walk you through exactly how to draw a realistic face from scratch. We’ll cover proportions, shading, and all the little details that separate a flat drawing from a truly lifelike portrait.
By the end of these 7 steps, you’ll have a complete realistic face drawing and a repeatable process you can use every single time.
🖊 What You’ll Need
HB pencil (for outlines)
2B pencil (for shading)
4B or 6B pencil (dark shadows)
White sketchbook paper
Kneaded eraser
Blending stump or tissue
Step 1 of 7
Draw the Basic Head Shape to Start Your Realistic Face
Start by drawing a light oval shape on your paper. This doesn’t need to be perfect — it’s just a guide. The oval should be slightly wider at the top (forehead) and narrower at the bottom (chin). This is the foundation of any realistic face drawing.
Draw this shape very lightly with your HB pencil. You’ll be erasing and adjusting lines throughout the process, so never press too hard at this stage.
💡 Pro Tip: Tilt your oval slightly if you want a 3/4 view face — this looks more dynamic and interesting than a straight-on portrait.
Step 2 of 7
Add Proportion Guidelines for a Realistic Face Structure
This is the most important step when learning how to draw a realistic face — and the one most beginners skip. Draw a vertical line down the center of the oval and a horizontal line across the middle. This midpoint is where the eyes sit.
Now add three more horizontal lines: one at the top of the oval (hairline), one halfway between the eye line and the chin (bottom of the nose), and one halfway between the nose line and the chin (mouth line).
💡 Pro Tip: The eyes are always at the exact middle of the head — not near the top as most beginners instinctively draw them.
📐
📸 Image 2 — Proportion Guidelines · Place between Step 2 and Step 3
🤖 AI Image Prompt
“A clean educational diagram showing a human face oval with horizontal and vertical proportion guidelines, minimalist illustration style, white background, labeled lines showing hairline, eye line, nose line, and mouth line, pencil sketch look”
Alt Text: realistic face drawing proportion guidelines for beginners
Step 3 of 7
Draw the Eyes — The Most Expressive Part of a Realistic Face
Place the eyes along the horizontal midline. Each eye is roughly one eye-width apart, and there’s one eye-width of space between the two eyes at the center. Draw an almond shape for each eye — flat on the bottom, slightly curved on top.
Add the iris (a circle), and make sure part of it is hidden under the upper eyelid. This makes the eye look natural. Leave a small white highlight spot in the iris — this is what gives the eye life and realism.
💡 Pro Tip: Never draw the full circle of the iris. A face with fully visible irises looks startled or cartoon-like, not realistic.
Step 4 of 7
Place the Nose Using Your Realistic Face Guidelines
The bottom of the nose sits on the third horizontal line you drew. The width of the nose is roughly equal to the distance between the inner corners of the two eyes — a very useful rule when drawing a realistic face.
Avoid outlining the whole nose. In realistic face drawing, the nose is mostly defined by shadow and highlights, not hard lines. Draw the nostrils lightly, and indicate the sides of the nose with soft shading rather than solid lines.
💡 Pro Tip: Less is more with the nose. A common beginner mistake is drawing too many hard lines — it ends up looking like a cartoon.
Step 5 of 7
Draw the Mouth to Bring Your Realistic Face to Life
The mouth sits on the fourth horizontal guideline. The corners of the mouth align roughly with the center of each eye — use this rule every time you draw a realistic face and it will always be in the right place.
Draw the top lip with a subtle “M” shape (the Cupid’s bow) and the bottom lip as a single gentle curve. The line between the lips is darker than the lips themselves, so draw it slightly heavier. The bottom lip catches more light, so it should be lighter in tone.
✏️
📸 Image 3 — Shading Demo · Place before Step 6
🤖 AI Image Prompt
“A side-by-side pencil sketch comparison showing a flat unshaded face drawing vs a fully shaded realistic face drawing, educational illustration style, white background, graphite art, clean and detailed”
Alt Text: how to shade a realistic face drawing with pencil
Step 6 of 7
Add Shading — This Is What Makes a Face Look Truly Realistic
Shading is the single most important skill in how to draw a realistic face. Decide where your light source is coming from (top-left is the most natural) and keep it consistent throughout the drawing.
Use your 2B pencil to add medium shadows on the side of the nose, under the cheekbones, under the lower lip, and along the neck. Switch to your 4B or 6B pencil for the darkest areas — inside the nostrils, the pupils, and deep shadow areas.
Use a blending stump or your fingertip to smooth out the shading so transitions look soft and gradual. Realistic skin has no hard edges — everything flows smoothly from light to shadow.
💡 Pro Tip: Use your kneaded eraser to lift pencil off the paper in highlight areas — the bridge of the nose, the center of the forehead, and the top of the lower lip. This creates a luminous, three-dimensional look.
Step 7 of 7
Add Hair and Final Details to Complete Your Realistic Face
Draw hair using long, flowing strokes that follow the direction of growth — never scribble it in. Start from the hairline you drew in Step 2 and work outward. Vary your pressure to create light and dark strands naturally.
For final details, darken the lash line above the eyes, add subtle eyebrow hairs using short light strokes, and refine any areas that need more contrast. Step back and look at the whole drawing — adjust any proportions that feel off.
Congratulations — you’ve just learned how to draw a realistic face from start to finish!
💡 Pro Tip: Sign your drawing and date it. Looking back at your progress months later is one of the most motivating things you can do as an artist.
🖼️
📸 Image 4 — Finished Drawing · Place after Step 7
🤖 AI Image Prompt
“A complete finished realistic pencil portrait of a neutral female face, professional graphite drawing on white paper, soft lighting, highly detailed shading on cheeks and eyes, fine art sketch style, elegant and clean composition”
Alt Text: finished realistic face drawing pencil portrait example
Common Mistakes When Drawing a Realistic Face
Even with the right steps, beginners often make the same errors when learning how to draw a realistic face. Here are the most common ones to watch out for:
⚠️ Avoid These Beginner Mistakes
Drawing the eyes too high on the head — remember, eyes sit at the exact middle of the skull.
Making the nose too wide or outlining it with hard lines — use shadow instead.
Pressing too hard with the pencil early on — start light and build up gradually.
Skipping the proportion guidelines — they exist for a reason and save you hours of frustration.
Ignoring the light source — inconsistent shading ruins an otherwise good realistic face drawing.
How to Improve Your Realistic Face Drawings Fast
Practice Every Day — Even for 10 Minutes
The fastest way to improve at drawing a realistic face is consistent daily practice. You don’t need hours — even 10 focused minutes every day will produce dramatic results within weeks. Fill a sketchbook page with just eyes one day, just noses the next.
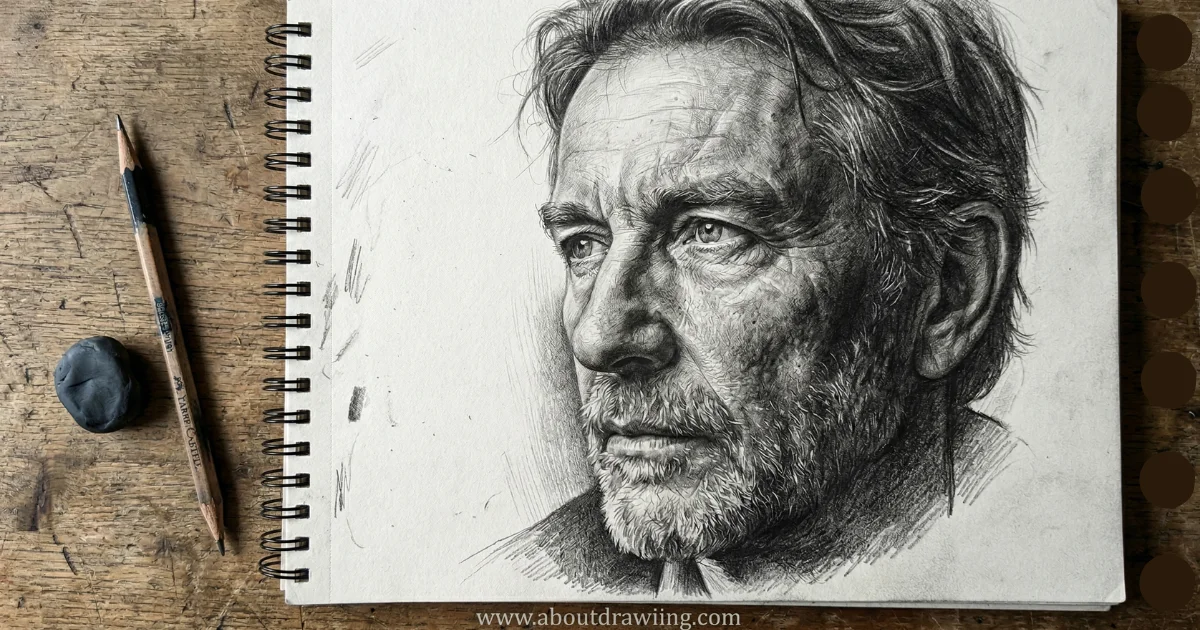
Use Photo References
Using photo references is not cheating — it’s how professional artists work. Find a clear, well-lit portrait photo and study how the shadows fall, where the highlights appear, and how each feature relates to the others. Learning from real faces is essential when mastering how to draw a realistic face.
Study the Work of Master Draftsmen
Look at the portrait work of artists like John Singer Sargent, Kathe Kollwitz, or contemporary illustrators on platforms like ArtStation. Notice how they use minimal lines to suggest maximum detail. This study will transform how you see and draw realistic faces.
Frequently Asked Questions
How long does it take to learn how to draw a realistic face?
With daily practice, most beginners see significant improvement within 4–8 weeks. Mastery takes longer, but you’ll draw recognizable realistic faces much sooner than you expect.
What pencils are best for drawing a realistic face?
A set of HB, 2B, 4B, and 6B pencils covers everything you need. HB for light structure lines, 2B for mid-tones, and 4B–6B for deep shadows.
Do I need expensive art supplies to draw a realistic face?
No. A basic set of graphite pencils under $15 and a smooth sketchbook are all you need to start drawing realistic faces. Technique matters far more than expensive materials.
Can I learn to draw a realistic face without any prior experience?
Absolutely. This guide is designed specifically for complete beginners. The 7-step process takes the guesswork out of face proportions and shading — the two biggest challenges for new artists.